Everytime you visit any website on the net, 99% of the time you will see the top bar menu. Here’s a screenshot of what a Menu is (see Home, About and Parent Page links).
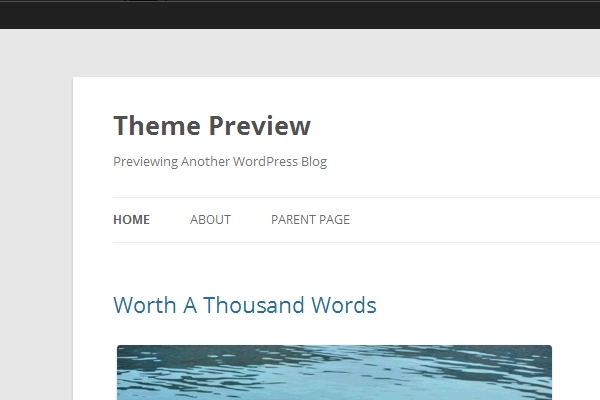
In this quick tutorial, I will show you how to use WordPress custom Menu. However, I must also remind you that not every WordPress theme supports custom menu. Custom menu was introduced in WordPress 3.0 and every WordPress theme that says “Support for WordPress 3.0” usually comes with the custom menu feature.
Just follow thse simple steps:
1. In your dashboard, hover to Appearance and click on the Menus link.
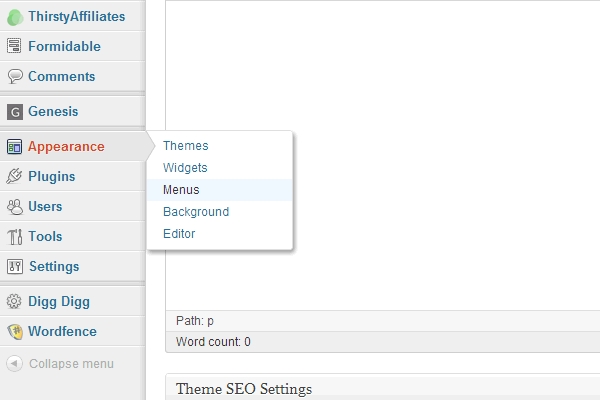
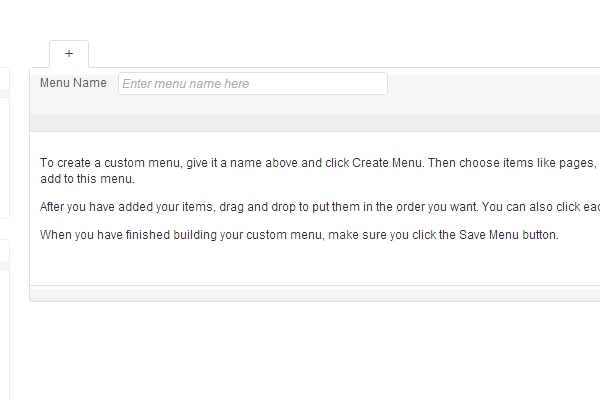
2. Next, in the Menu Name field, type in your menu name. Just give it any name. In this tutorial, I simply named it to Main Menu. Then, click on the Create Menu button just on the right side (not shown in the screenshot below).
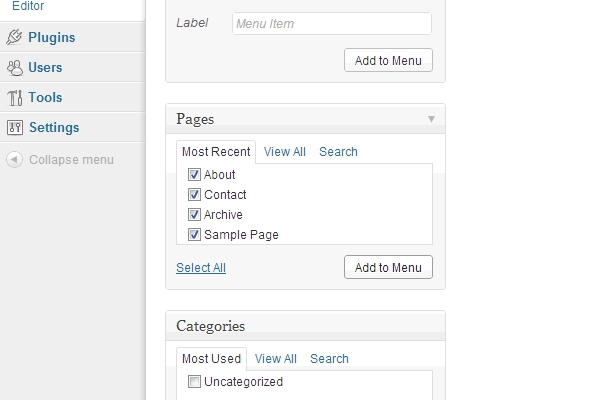
3. Once you have created a new menu, on the left side on the screen, you will see few checkboxes. Tick on the items you want to show on the custom menu. This includes pages, categories or you can also use custom link to link to any external website. Click on the Add to Menu button.
3. Choose the menu you want to use from the dropdown. In this tutorial, I’m using the Twenty Twelve theme, the default WordPress theme. Then, hit the Save button.
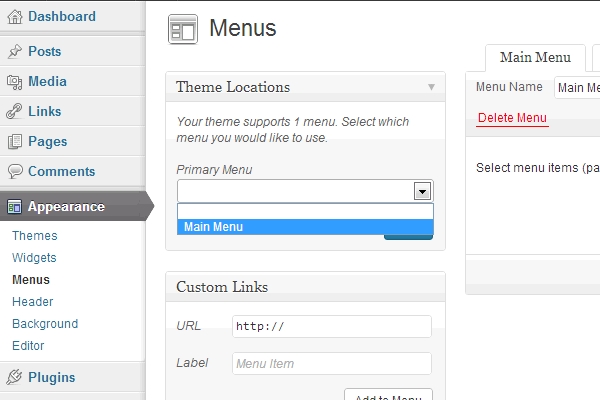
- Twenty Twelve theme only supports one custom menu as can be seen above. Some WordPress themes support more than one menu - Primary Menu, Secondary Menu, Footer Menu etc.
- Since this tutorial is intended for beginner, I’m not going to show you the process to add support to custom menu.
For more information about WordPress custom menus, WordPress codex is always be your best resource. I highly suggest you read these articles:
- WordPress Menu User Guide
- Using Menus in WordPress 3.0 | Digging into WordPress
[…] 2. Create your menu. If you’re not familiar to this, read my tutorial - WordPress101: Using WordPress Menu. […]